Friday, February 26, 2016

Bright Young Women

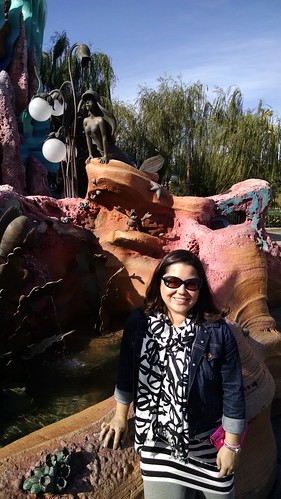
My husband knows all of the words to every song in Disney's Little Mermaid.  I have personally verified this fact.


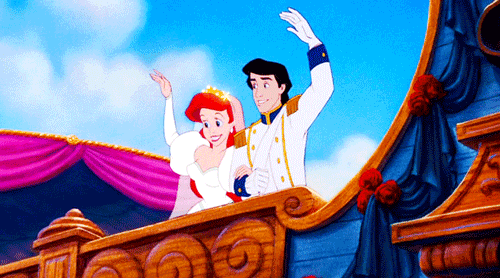
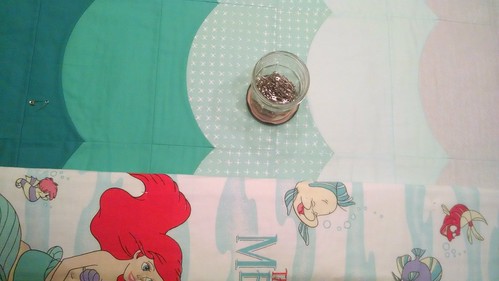
Apparently, Eddy's little sister, Ceci, was quite the fan and also quite the repeat watcher as a kid.  Ceci's all grown up now and when her birthday rolled around this year, I knew just what to do (even though I was a few months late in doing it.) You see, while out thrifting one day I found a vintage Little Mermaid bed sheet (alright, two of them) and I knew they must be backing for a quilt (alright, two of them.)  Thankfully, I already stumbled upon this amazing tutorial for a modern waves quilt, so a mere 2 months after Ceci's birthday I started cutting!

IMG_20160107_170156

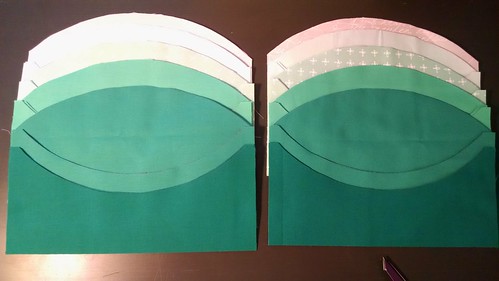
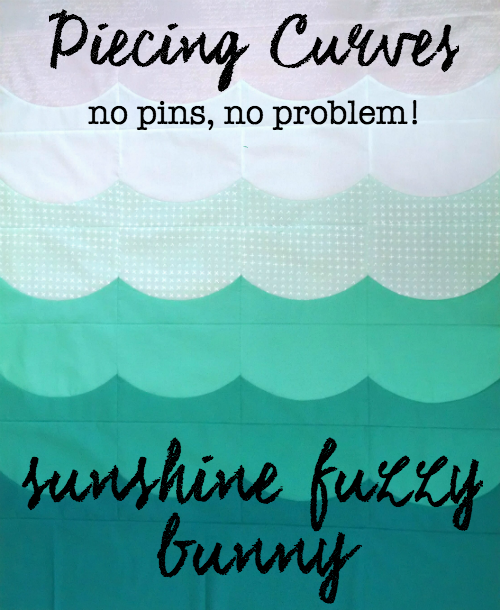
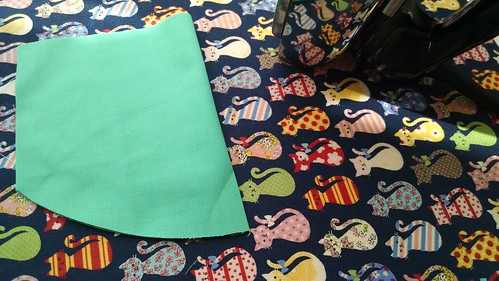
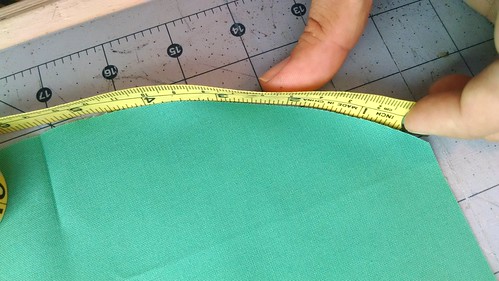
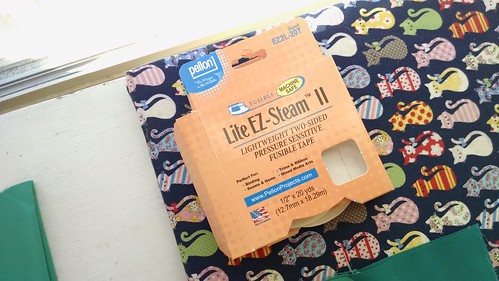
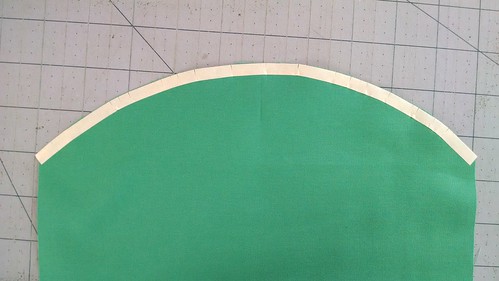
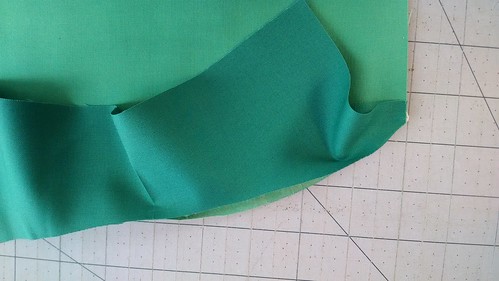
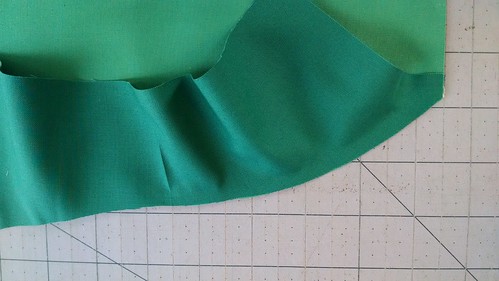
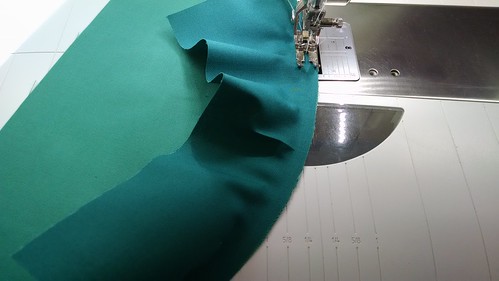
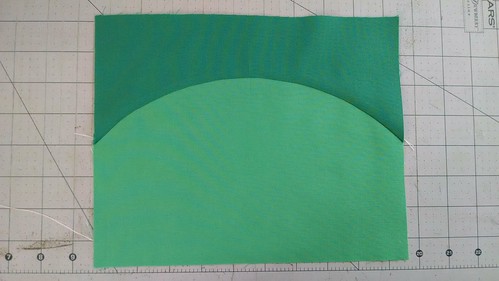
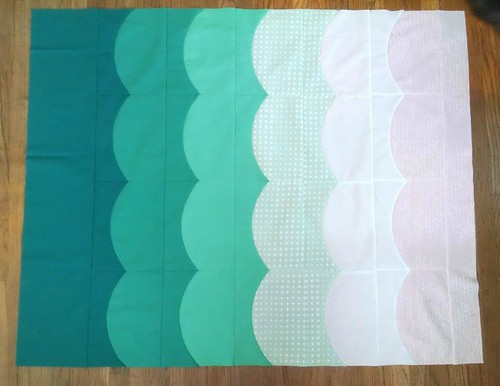
I pieced about a million curves (USING THIS FANCY NEW TUTORIAL I JUST MADE!)

IMG_20160202_141210

I did the basting.

IMG_20160202_194239

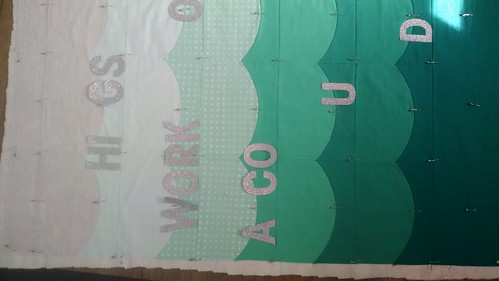
And then I started my special quilt lettering method.

IMG_20160203_115045

Now, let's pause here and talk about The Little Mermaid.  Those of you who are *not* TLM lovers can just move right along to the pretty pictures. Those of you who love TLM, have you watched it recently?!


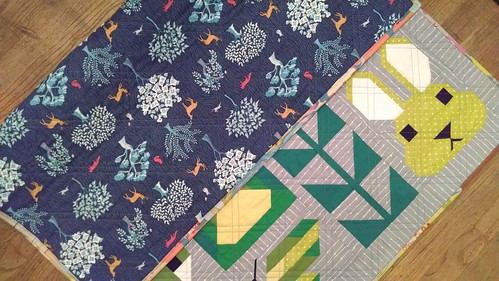
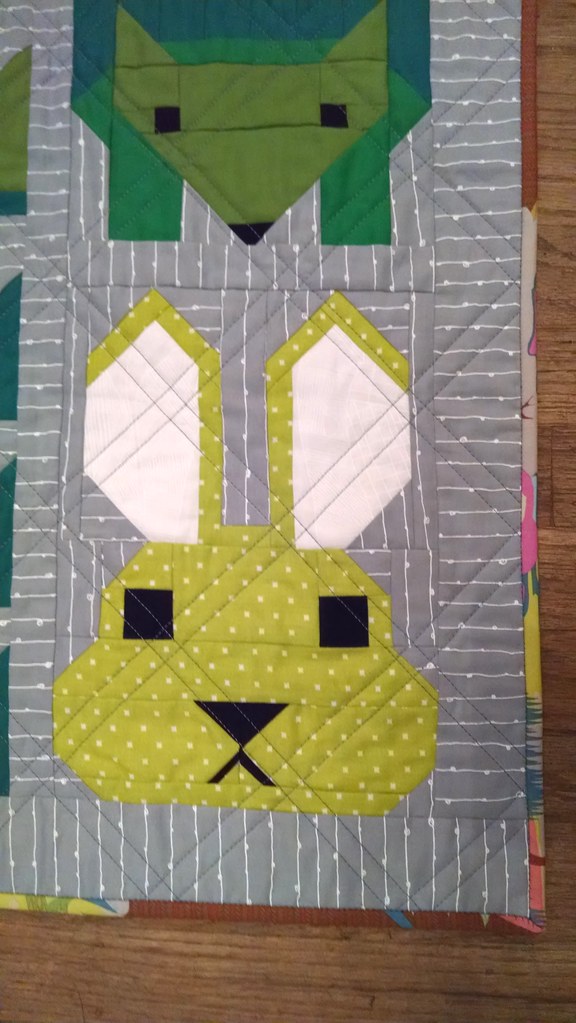
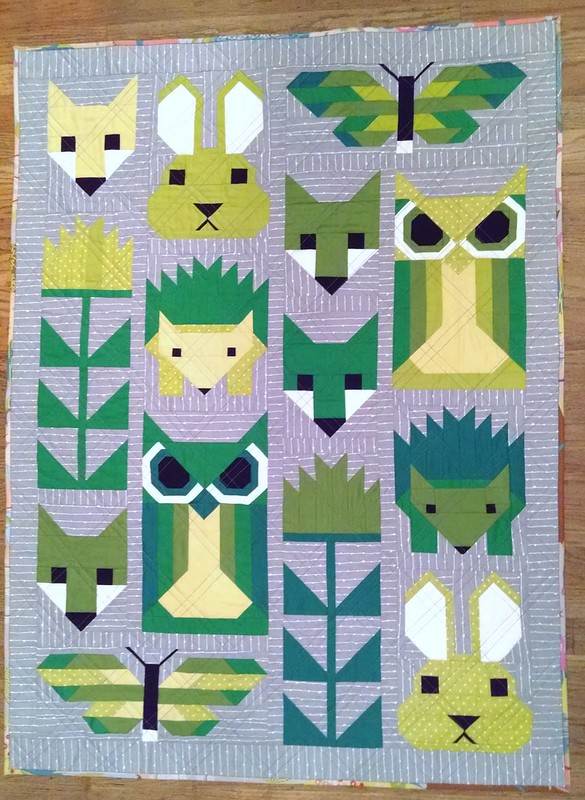
One thing I do when I make quilts inspired by Disney movies (see Cats and Rabbits and this Christmas quilt for my mom) is watch them.  But I mean watch them so much.

Like, the.
entire.
time.
I'm.
working.
on.
the.
quilt.  (I too am a repeat watcher.)  

TLM is so sexist, folks!


I mean, not even a tiny bit inoffensive.  Don't get me wrong.  When Sebastian is all, "What do they got? A lot of sand?" I'm all, "We got a hot crustacean band!"  I mean, it's so good!  It smacks of childhood nostalgia and there are so many memorable lines.


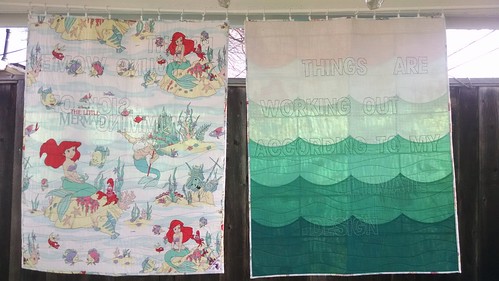
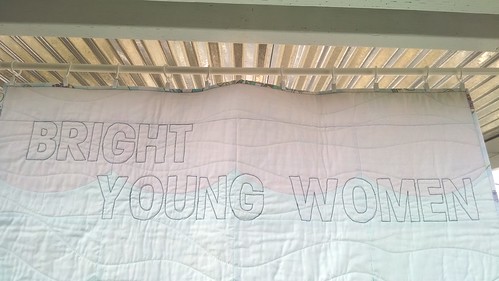
So what's a girl to do for her feminist, TLM-loving SIL?  Well, I picked the two quotes that were most positive toward women (especially when taken out of context) and I quilted those babies right into the front of the quilts.

Ceci's quilt reads:

Bright young women
Sick of Swimming
Ready to Stand

And mine reads (Did I mention? Two sheets. Two quilts. One for me!):

Things are Working Out
According to my ultimate design

This is an actual thing Eddy and I say sing to each other when, well, things are working out according to our ultimate design.  It's such an applicable song lyric for your everyday life.  I promise.

I challenge you not to sing those quotes in your head!  Not even possible.

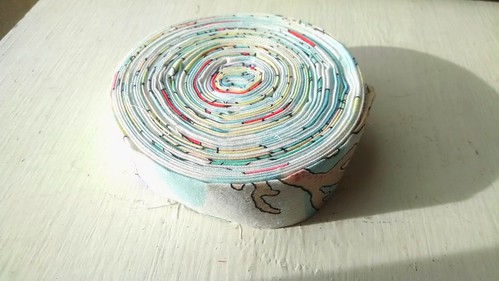
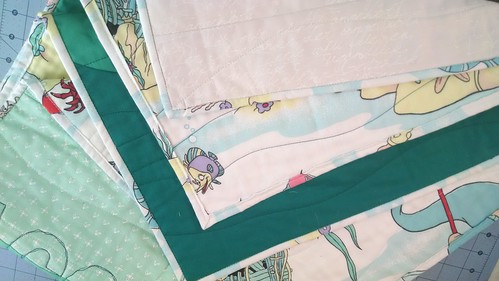
So back to the quilting.  I bound the quilt using more little mermaid sheets.

IMG_20160204_154010

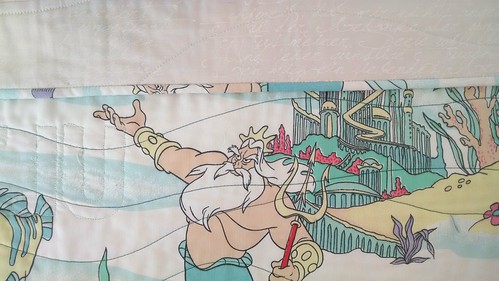
Which resulted in some pretty nifty little snapshots, my favorite of which is King Triton staring down King Triton.

IMG_20160209_125023

And this little corner scene.

IMG_20160209_141659

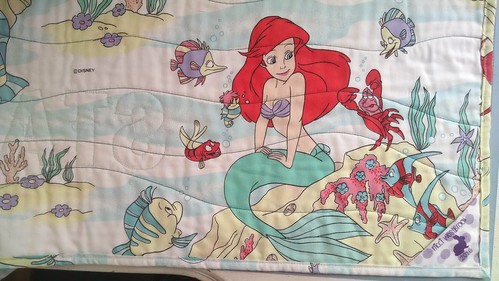
Here are the finished quilts!

IMG_20160209_125124

IMG_20160212_092304

IMG_20160212_092604

IMG_20160212_092657

Things are working out according to my ultimate design. Soon I'll have that little mermaid and the ocean will be mine! [evil cackle]

Dangerous Curves: A Quilting Tutorial on Curved Piecing

Piecing curves in quilting is kind of a big deal.

At least some people are pretty intimidated by them.  When I decided I wanted to make my first curved piecing quilt I culled through tons of tutorials before establishing a method that works well for me.  What I learned is that curves do take time, but they're easy!  (Best kept secret in quilting.)

Later I tried to tell my quilting friend, Nina, about how easy it is to piece curves and I felt like I needed a tutorial to explain it, but I never did make one.  When I decided to make my second curved piecing quilt I spent wasted about an hour trying to remember my special method from the first curved quilt, so now, drumroll please... My first ever quilting tutorial!


Tutorial2


Two quick notes before we get started!

This tutorial is based on a short video tutorial I found many months ago, but can no longer find!  I did not invent this method, I am just sharing it here to spread the good word.  Additionally, this is a method that works consistently well for me, not necessarily the officialest or schmanciest way to piece curves.

This tutorial assumes that you have already selected a pattern and cut your fabric for piecing.  If you are not familiar with curved fabric patterns, Erica at Kitchen Table Quilting has a great (free!) pattern for a beautiful modern quilt for beginners that uses just 20 large curved blocks.  It is called the Deep Blue Sea Baby Quilt Tutorial. Also, Check out the Little Mermaid quilts I made using this tutorial!  Gah!  They're so cute!

Supplies:

  • ruler
  • rotary cutter or scissors
  • iron
  • lightweight two-sided pressure sensitive fusible tape (more about this in a moment)
  • curved fabric units that you wish to piece together  
That's it!  No pins, baby!

Method:


1.  Fold both sides of your curved pieces (the concave and the convex sides) in half and press a crease in the middle of the side with the curve.

IMG_20160201_124806

I press about 1-2" from the edge of the curve.  This will just help you match the middles of your concave and convex pieces.  I do these two at a time since I like to be lazy speedy.  You can also probably finger press rather than iron as long as you get a good crease.  

2.  Measure the length of the curve you wish to piece.  

IMG_20160201_121819

I use a flexible tape measure and just hold it up along the edge of the curve.  This measurement doesn't need to be exact, so don't fret.  For the Deep Blue Sea quilt, that measurement is 11".  If you don't have a flexible measuring tape, use a piece of string or yarn to measure your curve and then measure that piece of yarn with a straight ruler.

3.  Cut a length of your lightweight two-sided pressure sensitive fusible tape that matches the length of the curve you wish to piece.

IMG_20160201_122641

I always use Pellon Lite EZ-Steam II and have had great luck with it.  If you can't find this product, the key is right there on the box.  You need something two-sided, something that is pressure sensitive (meaning you can smoosh it together and it will stick), and something that is fusible. There is probably a fancy quilting product that has all of these properties *and* is 1/4" wide, so if you know one, feel free to leave it in the comments.

4.  Cut your piece of tape in half lengthwise (so that you end up with a piece of tape that is as long as the curve you wish to piece and is 1/4" wide to match your seam allowance).  So for each piece of tape you prepared in step 3, you'll be able to piece two curves.

5.  Using your scissors make snips along one side of your tape approximately every 1/8" or so.

IMG_20160201_122117

Your snips don't need to be spaced perfectly, the important thing is to just make enough snips to ease the tape around your curve.  Be careful not to cut all the way through the tape. (Though I have been known to salvage a piece of tape even if I cut all the way through it!)  

6.  Attach the sticky side of your tape to the right side of a convex piece.

IMG_20160201_122124

Attach the tape with the snipped side toward the curved edge.  At this point, you could just peel back the paper covering of the sticky tape and begin to match and press your curve pieces.  However, I have always had trouble making this product stick to the first piece of fabric when I pull the tape back, so...

7.  Press the tape using a hot, dry iron then peel the paper from the tape.

IMG_20160201_122153

8.   Match your concave and convex pieces (right sides together) and press them in place using the sticky tape!

IMG_20160201_122226

This step is difficult to photograph because you really need all of your fingers to place the curves just so!  Begin by matching up the crease you pressed into the center of the concave piece with the crease you pressed into the convex piece and press to stick the fabric together.  Once the middle is matched up, match one of the edges and press it into place with the sticky tape (shown above).  Now start halfway between the center crease and one edge and press carefully in both directions until you have 1/2 of the unit stuck together satisfactorily.

If you've pieced curves before using pins, this step will be familiar to you.

IMG_20160201_122318

Repeat for the other side.

In my experience, this tape is infinitely repositionable, so if you mess up, just peel the fabric apart and reposition until you get a perfect curve.

9.  Press along the curve to fuse the tape.  I usually press about 1" in with my iron even though the tape only extends 1/4" in on the curve.

10.  Sew your curve! 

IMG_20160201_122442

11.  Press open and admire.  

IMG_20160201_120259

Only 19 more of these babies and you'll have yourself a Deep Blue Sea Baby Quilt!

Conclusion:


This process might seem a little tedious (and it is!) but once you get the hang of it, it can go quite quick. I would estimate one of the curves from start to finish (steps 1-11) takes me about 5-10 minutes once I'm really going.  Also, having experimented myself with pinning curves, I think this method is a bit faster (even with all of the pressing) and I certainly find it more accurate than using pins.

Enjoy!  Please feel free to leave questions or comments in the comments section below!

Wednesday, February 24, 2016

Japanniversary! Tokyo Disney Sea and Disneyland

I am going to go ahead and admit that I am the worst ever gaijin (foreigner) and that Tokyo Disney Sea and Disneyland were my favorite part of our Japan trip.  They were just so Disney.  Also so Japanese.  It.  Was.  Amazing.

First off, we stayed at the swank Ambassador Hotel. Our room was huge, it was pool view, the hotel was gorgeous and decked out for Christmas. It was a top caliber Disney hotel but let's be honest. The best part was all of the Disney toiletries.

IMG_20151112_070136

I mean, just look at these.

IMG_20151112_070142

We ate dinner in the hotel the first night and the finale was this dessert where everything on this plain white plate was edible.

IMG_20151110_205444

The next day, breakfast was decidedly more low key as we sat in weird picnic lines and waited to be the very first to be let in Disney Sea early.

IMG_20151111_070540

IMG_20151111_071147

Because of the population density in Tokyo and the crowds at Disney, it's a big deal to be let in the park early so tons of people camp out early in the morning. We were those people. Here's how excited I was to have those early entry tickets.

IMG_20151111_072822

Also, I totally saw a Japanese dude taking a selfie with his early entry passes like that, so of course I had to do it too. Okay, so we got into the park and we were the first passengers that day on Tower of Terror!

IMG_20151111_081413

For those of you who like the American version of the ride, this one had to be thematically different because I think Old Hollywood and Twilight Zone wouldn't really make sense in Japan as a theme, so there was a weird explorer/tiki theme and the effects were spectacular.

One of the lands we really loved was Little Mermaid Lagoon.

IMG_20151111_094641

IMG_20151111_094724

IMG_20151111_094903

We saw this young Japanese couple checking out the restaurant in the Lagoon and the girl was fawning over these burgers with buns made to look like shells and her boyfriend just gave us a look like, oh jeez, chicks be crazy about Little Mermaid!  Truth (just wait until you see my blog post coming this Friday).

We also really loved Mysterious Island, which is designed around Jules Verne novels (of which we are big fans.)

IMG_20151111_101009

IMG_20151111_101144

IMG_20151111_124646

They also had gondola rides through fake Italy complete with singing in Italian, but jokes about gondolas in Japanese.

IMG_20151111_154725

IMG_20151111_154847

The next day we did Tokyo Disneyland.  Here I am waiting in the early morning line picnic with my sandwiches!

IMG_20151112_073228

The second day we were the first riders on Space Mountain, the absolute very first! The weirdest and most Japanese part of that was that when the opened the gates for the ride, we were led in (the whole way) by a Japanese woman who politely let us know where to watch our step and where to turn. The most amazing part, though, was that either intentionally or unintentionally they didn't have all of the lights actually turned on yet for the roller coaster. Let me tell you, it feels about 10x faster when there are not as many visual references in the room.

So the thing about Tokyo Disneyland is that it is pretty similar to the American parks, so we didn't actually take many pictures that day other than Eddy in front of the castle,

IMG_20151112_102244

and me with my new BFF.

IMG_20151112_094700

Nicci + 2 of hearts forever!

Next up: Hiroshima.

Friday, February 19, 2016

A Quilt From Crazy Aunt Nicci

Eddy and I are going to be uncle and aunt soon!  Eddy's brother Gene and his amazing wife, Annie, are expecting a baby boy.

g and a copy

My response to all such news is, of course, quilts!

I knew from the start that I wanted to make the Elizabeth Hartman Fancy Forest pattern. Her patterns are seriously the cutest. Annie said to me, "green is always good," so off I went!

IMG_20160106_171535

Did I mention how cute this pattern is?

IMG_20160125_121516

Here's a picture of Aunt Nicci and Uncle Eddy.

IMG_20160125_140251

Eddy thinks these owls look real angry, but they're totally my favorites.

IMG_20160125_160805

IMG_20160125_174504

IMG_20160125_191036

IMG_20160125_210818

Gah, this quilt is so cute!

IMG_20160128_100320

It was all I could do to wait until after the shower to post these pictures.

IMG_20160128_101058

Basting day.

IMG_20160128_124714

Here's the super great binding fabric.

IMG_20160128_155115

IMG_20160128_160347

The backing fabric is also pretty great.

IMG_20160128_173135

IMG_20160128_173233

Here's my self portrait.

IMG_20160128_173114

Here's the finished quilt!

IMG_20160128_173328

Ceci was kind enough to take the quilt to the Chicago area baby shower she hosted and Carol was kind enough to send us a picture of Gene and Annie opening the quilt at the baby shower.

IMG_2586

Every time I make a new quilt I think it's the best quilt I've ever made. It might be hard to top this one! Welcome, welcome little nephew.